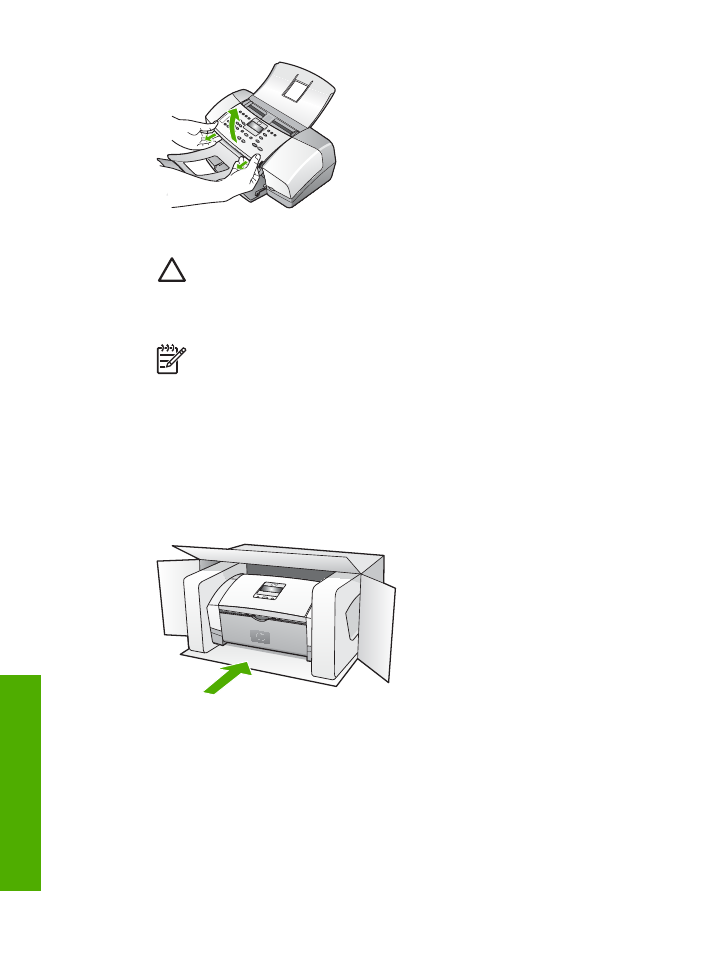
Remove the control panel faceplate
Complete the following steps once you have removed the print cartridges and unplugged the
HP All-in-One.
Caution 1
The HP All-in-One must be unplugged before following these steps.
Caution 2
The replacement HP All-in-One will not be shipped with a power cord. Store
the power cord in a safe place until the replacement HP All-in-One arrives.
To remove the control panel faceplate
1.
Press the
On
button to turn off the HP All-in-One.
2.
Unplug the power cord, and then disconnect it from the HP All-in-One. Do not return the
power cord with the HP All-in-One.
3.
Remove the control panel faceplate as follows:
a.
Place your hands on each side of the control panel faceplate.
b.
Use your fingertips to pry the control panel faceplate off.
User Guide
115
HP w
arranty
and
support

4.
Retain the control panel faceplate. Do not return the control panel faceplate with the HP All-
in-One.
Caution
The replacement HP All-in-One might not come with a control panel
faceplate. Store your control panel faceplate in a safe place, and when the
replacement HP All-in-One arrives, reattach your control panel faceplate. You must
attach your control panel faceplate to use the control panel functions on the
replacement HP All-in-One.
Note
See the Setup Guide that came with the HP All-in-One for instructions on
how to attach your control panel faceplate. The replacement HP All-in-One might
come with instructions for setting up your device.